
In these cases, however, we are often held back by practical and economic reasons: we have to call in a builder to remove the old tiles and/or a tiler and apply the new ones, with all the related inconveniences due to the impracticability of the rooms.
But the biggest problem is undoubtedly the cost of materials and labour.
Wouldn't it be nice to be able to completely change the bathroom or kitchen by doing it yourself?
New products, the result of new and advanced material processing techniques, come to our aid to simplify our lives and allow us to do on our own what would once have been impossible to achieve.
Tiling the bathroom
In this article we will see how to completely change the appearance of an old bathroom by using thin natural stone panels that will transform an anonymous tiling into a luxurious and original covering; all in the thickness of a few millimetres and without having to remove the old tiles.
Ultra-thin natural stone cladding panels

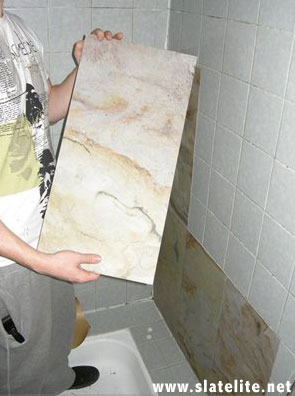
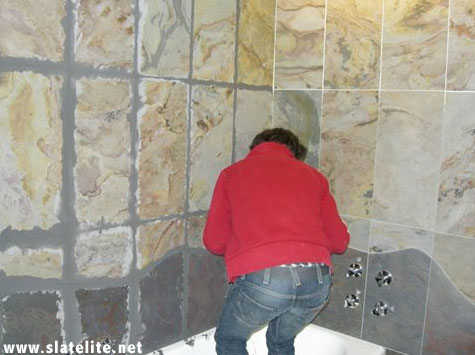
As you can see from the opening photos, the starting point is a bathroom in need of a facelift, but which will not be touched in its main elements.
The bathtub and other sanitary ware will not be changed, but only the appearance of the tiled walls will be renewed.
Preparation of the walls
All the movable elements that could be removed, such as the taps, the various soap dishes, and anything else that could obstruct the installation of the panels, have been removed.
Of course, if the sanitary ware is replaced at the same time, the installation work will be even easier.

The first step to be carried out, once the elements have been removed, is to clean the old tiles from all traces of dirt.
In the corners the grouting or silicone must be removed, which would not allow the stone veneer panels to adhere to the wall forming a perfect right angle.
Finally, the entire surface that will serve as a support for the new wall covering must be clean, free of dust and perfectly dry.
At this point we bring the sheets of thin stone close to the place of work, but where they cannot get in the way.
Always remember that the cleanliness of the site makes the work much easier, so don't wait until the work is completely finished to clean everything up.
For this job we will need nothing more than a long ruler, a sharp cutter and, of course, the panels.
Since we are using self-adhesive panels, no other glue is needed.
Before gluing, however, we must carefully define the orientation of the panels, how many there will be and where the cuts will have to be made.
For this purpose we take some panels and place them roughly on the wall to visually understand how the finished work will look.
Did we get the measurements right? Have we decided on the laying direction? All that remains is to glue the stone sheets together!
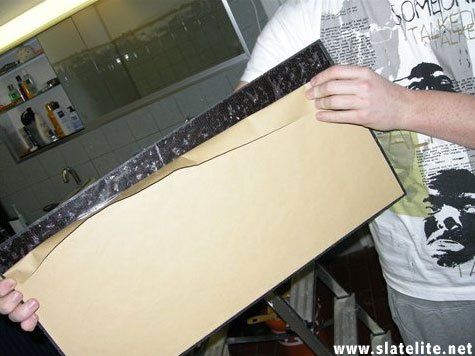
As you can see from the photo below, start by lifting the protective flap of the adhesive part.
Attention: it is convenient not to remove the film completely, but to lift only the flap of the part of the panel that we are going to glue to the wall.
Avoid touching the adhesive part with your fingers.
If you know how to place a plaster over a wound, you will also understand the procedure for removing the film from the adhesive part.
Once the flap has been lifted, the remaining part of the protective film will be removed at the same time as the panel sticks.
The reason? Very simple: it is much easier to reposition the panel in case of emergency or incorrect positioning if we have not first removed all the film that insulates the adhesive part.
Laying thin stone
Now let's go on to gluing the thin stone panels to the wall.
Normally we start laying the panels from an inside corner and from the bottom upwards.

Applying first the adhesive part of the panel we have previously uncovered, we continue to remove, slowly and from behind, the film until the panel is completely fixed.
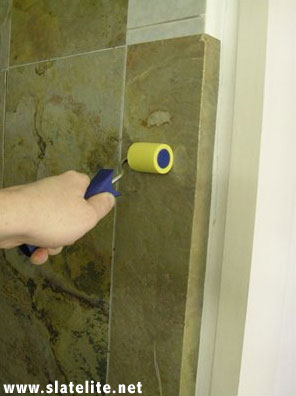
Using a small roller, we make each panel adhere even better.
Once all the panels have been laid, all that remains is to complete the work by grouting the joints.
During the laying of the panels, no spacer marks were used as the panels are adjacent and apparently without gaps.
However, the millimetric joints must be grouted in order to waterproof the surface and prevent water from penetrating between the cracks and unsticking the stone veneer sheets.
We apply paper tape to both sides of the joints to avoid excessively soiling the stone surface. After grouting, the paper tape will be removed and the stone will have to be cleaned of any residue.
White (but available in many colours) indoor cement, PCI Nanofug, was used to make the joints of this coating. Follow the manufacturer's instructions in preparing the cement and then apply it to the joints.
After a short time the paper tape must be removed and all excess grout residues must be removed.
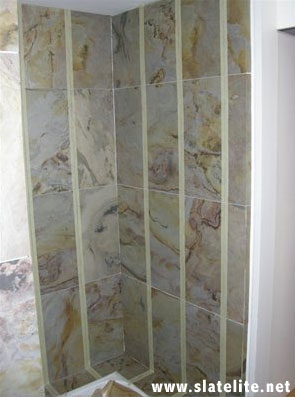
The result of the finished work can be seen in the following photo.
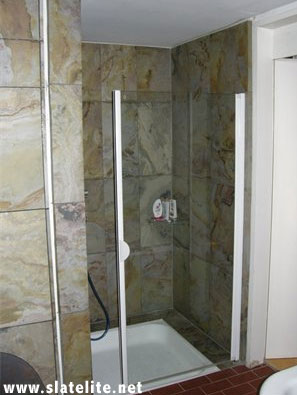
Quite a change, isn't it?
After a day's work the bathroom can be used again
Our new stone wall can be maintained in all its beauty with regular maintenance.
All natural stone, even if impregnated, should be cleaned with a soft cloth. Cleaners diluted in water and available in any hardware store can be used.
Under no circumstances should lubricating soaps, abrasives or acidic degreasing detergents be used.
Caution: Acidic cleaning agents and degreasers will dull the surface and are therefore not suitable.
Contamination with oil or oily residues can be removed with intensive cleaning agents (available in any hardware store).
If the surface of the stone tends to fade after some time, it can be easily refreshed using "Slate Lite Special Impregnator" or "Slate Lite Color Intensifier".